Thursday 28 September 2023

Autumn Vibes

 Hello, dear friends!

Today I'm here with a new card which celebrates autumn. I often regret that there is never enough time for autumn cards. Fast-approaching Christmas season seems to kick in earlier and earlier each year. Therefore, I decided to dedicate at least one month to the beauty of golden autumn. 

Today's card features cute little pumpkin I made of lightweight polymer clay.


Supplies:


Hugs,
Olga

Monday 25 September 2023

Fullness of Life

For today's make I started with a 12" square canvas and then layered my pieces on top of it - starting with a solid base is essential when you know you are going to be adding lots of dimensional pieces as it means you have a solid piece for displaying.

I started by making my focal piece using a mdf kit - window with shutters. Before assembling the kit I covered the back piece with some white gesso and once that had dried added the lady from the Steampunk 01 rice paper using decoupage glue (watered down magic glue will work too). As this image is currently out of stock you could use Alcie or the Mad Hatter from Alice 01  rice paper, the lady from simply beautiful rice paper or the couple under the flower arch from wedding 01 rice papers making this a very versatile style of project. Next I lended the white edges of the rice paper into the base by colour mixing my own shade of paint as this means the paper looks continuous rather than just plonked on.

The frame and shuters were then glued together before painting with brown paint and dry brushing with more white gesso. 


The back piece was then adhered to the rest of the window frame leaving the shutters open.

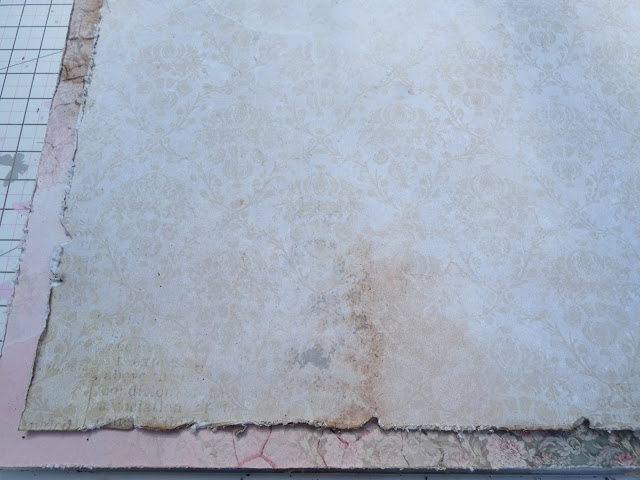
I chose two papers from the 12 x 12 Enchanted World papers deliberately selecting the side with no themed imagery on them as I wanted them to be back ground pieces. The first one I scuffed the edges with a pair of scissors and added  some brown distress ink before adhereing directly onto my canvas base. The second piece I cut to11" square and again scuffed and inked the edges . I deliberatelt added sine dustressed slits and curled the edges back on each side of this layer too for added interest.

I then autdiionely lots of my pieces so I knew approximately what pieces needed to be glued in place first. I chose to work predominatly with the floral images fussy cut from Alice Flowers 12 x 12 sheet but also added some elements from the Enchanted world extras pack.


If you compare the photo ablove with the finished piece you will see that I allowed the project to evolve as I built up the details. Having positioned and glued most of my pieces in place I then tucked in piece of chipboard taken from the Park Leaves set and also added in some faux vintage pink hydrangea flowers. To add a little more interest to the background around my imagery I used brown archival ink and paritally stamped images from a text background stamp. To make this easier for myself I warmed the stamp up in a microwave so I could take the rubber piece off the wooden block it comes on. 

Before adding my shabby ribbon 059 bow I dry brushed the p[apers and floral elements with white gesso and added lots of splatters with some of the brown paint I had used to paint the frame.


Thursday 21 September 2023

We Are All Mad Here


I wonder how many of your are like me - we acquire and I use that word very loosely all sorts of crafty goodies and then they sit in a pile that gets ever bigger. Well sometimes that pile just has to be reduced and I hope this project will show you that you can take an apparently disparate set of items and turn them into a single cohesive project with the help of some beautiful papers.

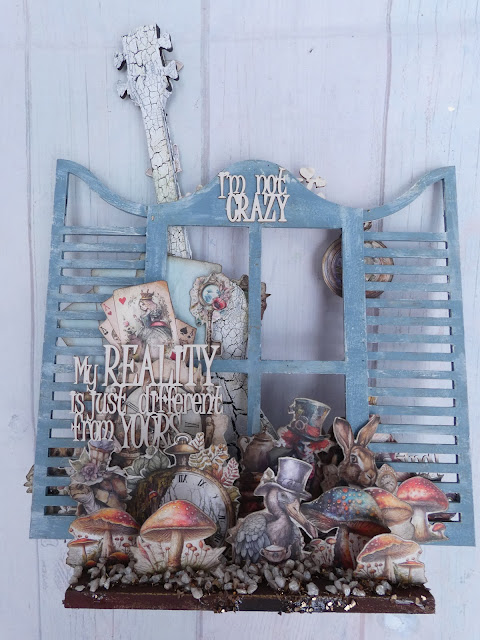
There are three MDF pieces in this project, two stand alone pices: window with shutters and the large MDF Guitar that have been combined with a small base allowing me to make my upright arrangement.

To start with I assembled the guitar and painted it with a dark brown paint before applying white crackle paste. I then had a play with the other mdf pieces so that I could prop the guitar upright. By adhering the shutters to the window the piece then fitted nicely into the slot in the base providing a base for the guitar to sit on and something to prop it up against.


The small base was painted with brown paint and then the window assemble with denim blue paint dry brushed with white gesso. There is a good selection of paints in the shop to choose from according to your taste and room decor.


 The MDF pieces were then glued in place using a combination of heavy body gel for longevity and hot glue for instant grab.

The finished base was then decorated using lots of fussy cut paper elements taken from enchanted world 6 x 12 extras each piece edged with vintage photo distress oxide around the edges. The pieces were then layered in place as shown in the project. Note the piece has two sides meaning you can change it round if you get bored of one side. This is a useful trick when making see through pieces and also when you have double sided papers as the images on the back of the project can still be a part of the front of the project.


I rummaged thorough my stash of chipboards - no surprise if I tell you its big! unitl I found some that I felt were appropriate. The title chipboard  I used is no longer available but this one we are all mad here will work very well. I also used Reality is a prison on the front side choosing only the words in the set. On the reverse of my piece I used both pieces from I'm not crazy set again adding some brown distress ink to the edges.

To fill in the base of the stand I applied some Magic Glue randomly before sprinkling over some stone chips and brown coloured chunky glitter.

I hope I have shown you can combine lots of different products together to make a project you can be truly pleased with providing you have a cohesive idea - in this case the Alchmey of Art Alice papers was the spring board with the guitar added to link with the title we are all mad here.

Monday 18 September 2023

Apple Season Cards

 Hello, dears!

Today I'm here with two cute cards created as a set. They feature one of my favourite collections "Apple Season" which I use all over the year. However, it definitely belongs to the golden season of apple picking. 


Supplies:


Take care,
Olga


Wednesday 6 September 2023

A Little Wheel Barrow


This week I have a little floral deocation to share with you - for me this is a little project but it still has lots of details so I hope you like it.

The base for the project is a plywood wheelbarrow as the base to hold a pretty floral arrangement. As usual I started by laying out the pieces so I knew how it would be constructed.

I glued the pieces for the bucket of the wheel barrow together and then let them dry.


For the wheel and handle pieces I started by gluing the two wheel pieces together and then when they had dried painted all of the plywood with a copper metallic paint - the antique gold creamy acrylic by Pentart  would also work really well with the autumnal shades of the rice paper that I used for decoration. The wheel base was then adhered in place.

Next I added a crackle medium to the "bucket" - shhhhhhhh don't tell anyone but it will appear at the retreat in September so hopefully will be added to stock however you can use any crackle that works in a sandwich between two layers of paint. Once it had dried I then painted on some white acrylic paint. Alternatively you could use a thin layer of the Stamperia white crackle paste in which case there is no need to add a layer of white paint over the top.

Next I selected images from the flowers rice paper (there are lots of options if you want different flowers but you will need a paper that has small images on it). I tore out the images I wanted and then glued them in place over the body of the wheel barrow using decoupage glue making sure I covered the images on the outside with the glue too so they were sealed in place. Watered down pva glue will work if you don't have a specialist rice paper glue. Once the glue was dry I added some more of my metallic paint around the edges of the bucket.


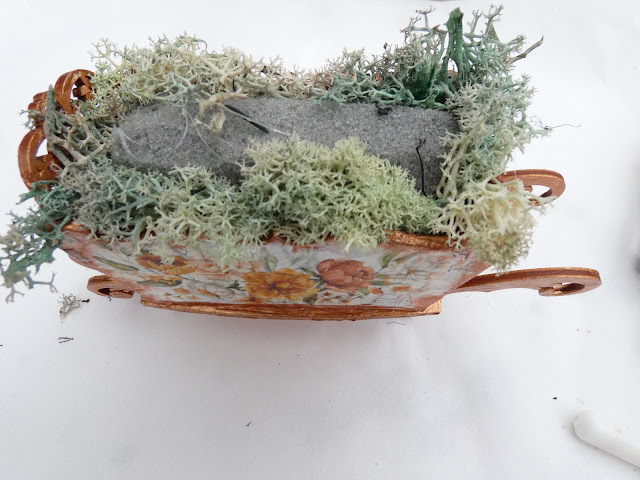
To fill the wheel barrow I then added some floral foam deliberately cutting it so it was proud of the top of the wheelbarrow. Then I added some moss using hot glue.


To fill the wheelbarrow I then added a selection of flowers in colours that I felt complimented the rice paper I had used - rose and yellow crimped hydrangeas - pushing the clusters they come as into the floral foam (you may need to trim the stalk a little and also use a pokey tool to make a hole in the foam for the stalk to go into.

 Next I added a few yellow cherry blossoms


Finally I tucked in some greenery - leaf 127, leaf 091 and leaf 105/ Adding until I was hapy with my overall composition.